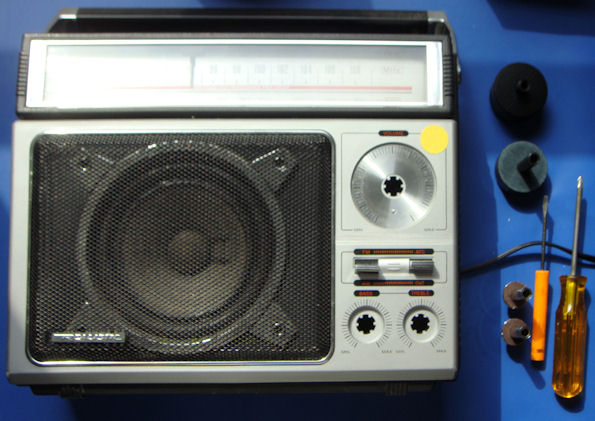
This page is designed to give you disassmbly instructions for the Realistic 12-650 AM/FM portable radio. I go a lot further, though, because a recent acquisition was in need of more complete restoration.
- Remove the tuning, volume, and tone knobs with a flat screwdriver:
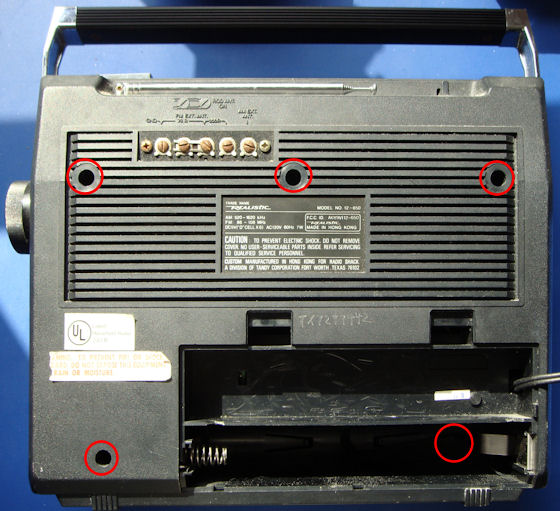
- Remove the back of the radio by unscrewing 5 screws. Make note of where each comes from, they are different types:
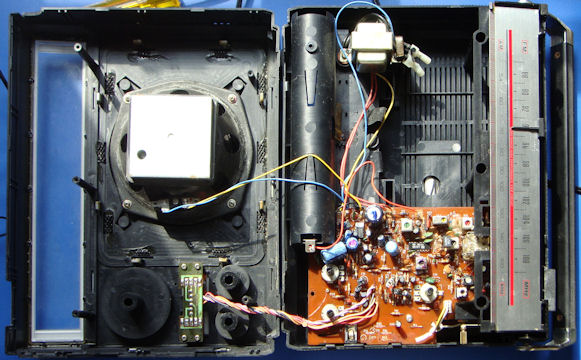
- Gently open the case from bottom to top:
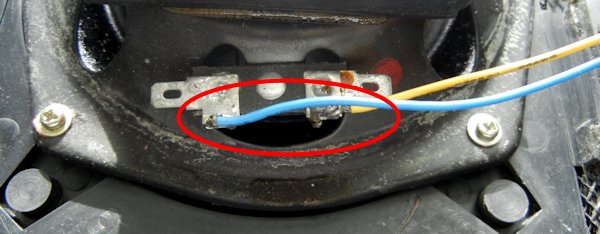
- Unsolder two wires from the speaker. Note where they go, it makes a difference.
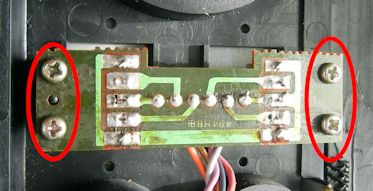
- Unscrew four screws that hold the switch board to the front panel.
The cabinet front is now loose and can be set aside.
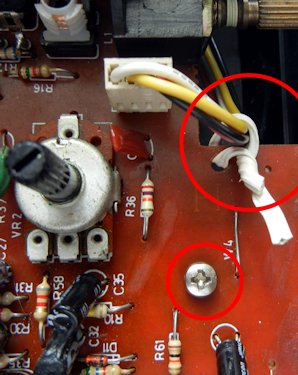
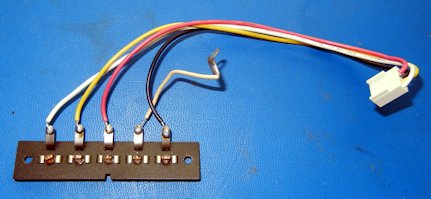
- Untwist a wire tie in the upper corner of the board, unplug the connector, and remove a screw in the indicated location.
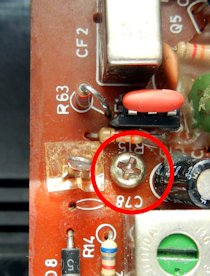
- Unscrew a board screw in on the left middle of the board near the FM ceramic filter.
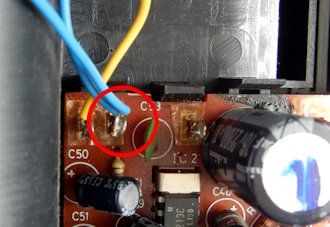
- Unsolder the battery compartment positive and negative terminals. Note on one version of the radio, this also disconnects the center tap of the transformer.

- Unsolder the two transformer wires.
- Unsolder the ground connection from the transformer. Note that in this version of the radio, it shares a terminal with a speaker wire.
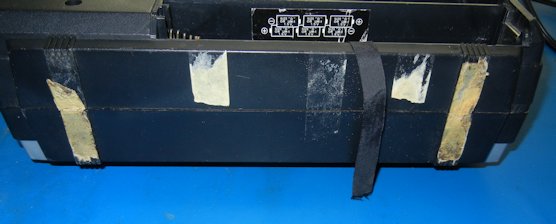
It is impossible for me to describe every possible connection Radio Shack made in production. My second unit differs quite a bit, because they used an AC/DC power switch on the back of the radio instead of automatically switching power as they did on my first radio. I have some photographs of this second version.
After unslodering the battery compartment positive, transformer, and ground wires, I can see the transformer ground wire goes underneath the PC board. And - were is the battery compartment negative wire?
Getting a bit ahead of myself, the board removed reveals the answer - the power switch operates on the ground from the transformer and the battery compartment. And that explains where the battery negative wire goes.
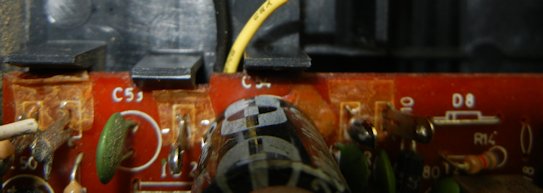
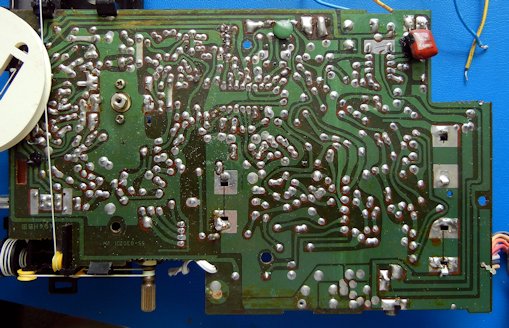
It is probably a good idea to take digital photographs of the connections in your radio (always a good idea for every make and model of radio). I took a close up of the PC board to show you the difference between an automatic switching radio and one with the manual switch.
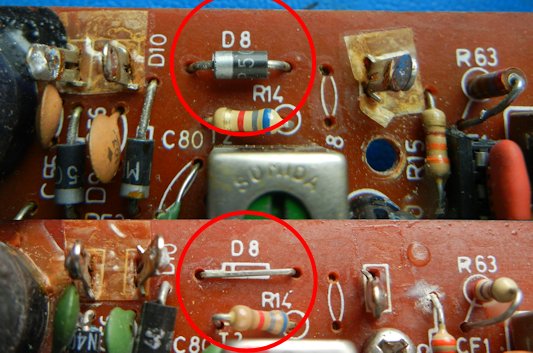
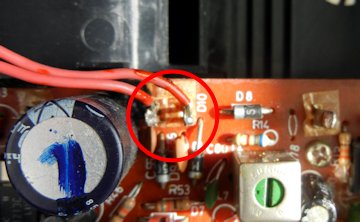
Automatic switching has D8, manual has jumper across D8 - now back to the disassembly instructions
- The PC board is now loose and can be removed from the cabinet back. If you need, you can use a small screwdriver to gently pry the cabinet away from the board mounted headphone jack.
The cabinet back can now be set aside.
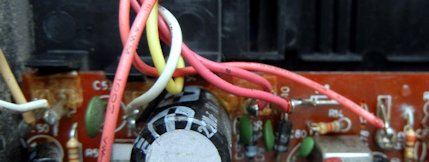
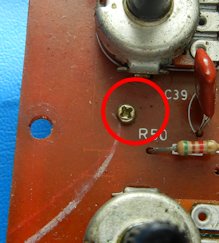
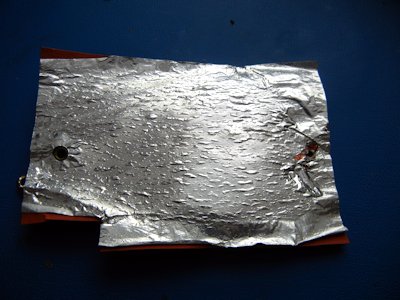
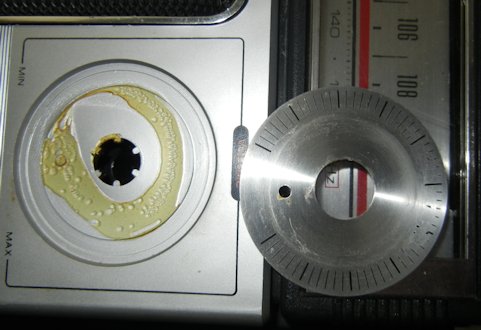
- There is a small screw in the bottom center of the PC board that holds a shield in place. The shield has a spacer (which happens to be a spare dial pulley, a flat washer, and a nut.
- Unsolder the shield lug from the PC board.
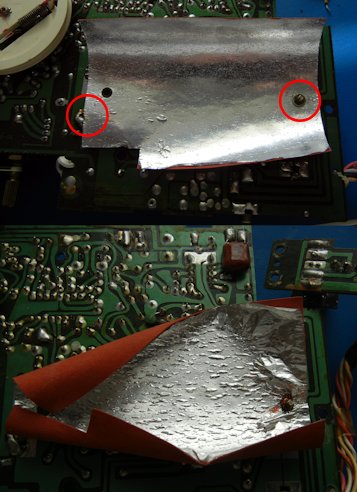
You notice I showed two views of this board shield. My reaction to Radio Shack is "are you kidding me?!" Look at the degree to which both warped. My original radio was bad enough, but the second one was WAY WORSE!. This is bad mechanical design, moisture gets into the cardboard, it expands, the foil doesn't. I bent them both back into shape and re-installed.
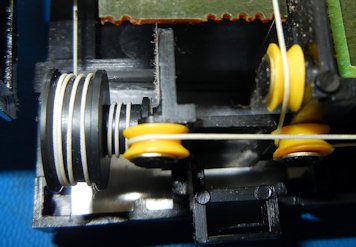
Removing the shield allows access to the back of the PC board. I temporarily unscrewed the dial cord pulley to get this view of the rear of the PC board.
You really don't want to do this unless it is absolutely necessary. Radio Shack uses a peculiar stepped pully on their dial stringing, making the tuning pulley smaller, but also making dial stringing a nightmare. You DON'T want to do this unless absolutely necessary! You have been warned - if you accidentally break the string or it comes unravelled - you are on your own! The manual has re-stringing instructions, thankfully, but if you broke the string it doesn't tell you how long to cut the new one.
Back to disassembly ----
Disassembly of the Front Panel
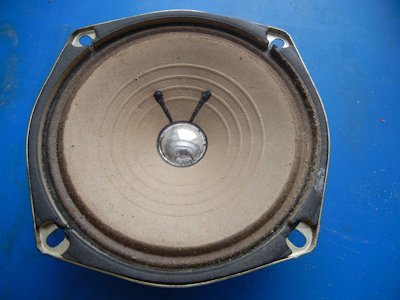
- To remove the speaker, unscrew four screws.
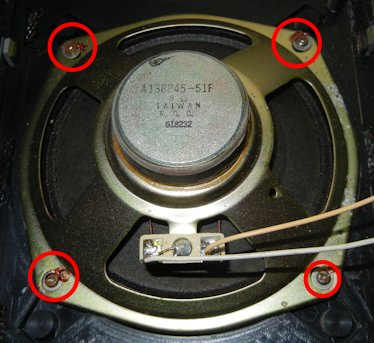
- Note the rather uninspiring speaker - this one had faded extensively. Whatever you do - resist the temptation to re-ink the cone to get rid of fading. Either replace the speaker with one the same size, or leave it alone. Of course if the cone is rotted out, you have to replace. I find auto parts stores like Pep Boys have a large selelction of different size speakers.
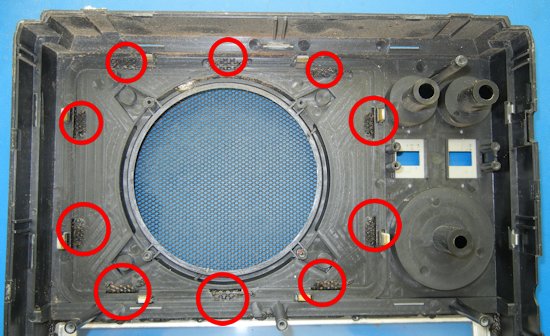
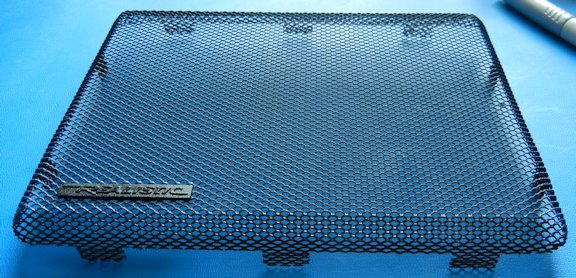
- Use extreme caution if you want to clean the grill - mine was so bad I had to, but be careful - the tabs can probably only be unbent and re-bent once, so do the job right and never touch it again. This shows the location of the grill tabs - make note of the direction they are bent.
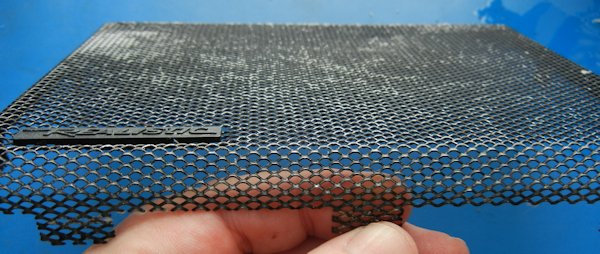
- Once the grill is removed, bend the tabs as straight as you can with pliers. This will make putting it back into the cabinet a lot easier.
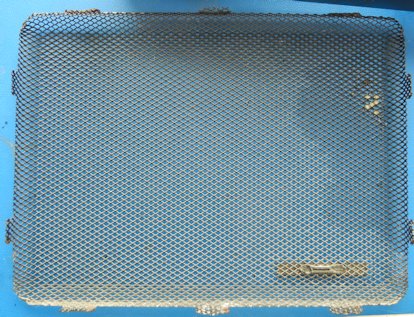
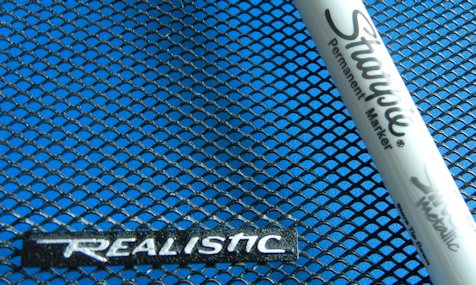
- My grill was really faded and desperately needed re-painting. If there are only a few minor cosmetic issues, you can use a black sharpie to fill in the black. Mine needed painting.
- To paint the grill, a very light touch is needed. Spritz for a fraction of a second a foot away, repeat very quick sprays, as few as possible to get the grill looking good. Too much paint, you make a mess and have to strip it and start over. Spritz - spritz - spritz. Fractions of seconds, as quick as you can do it. Dry in the sun for at least an hour.
- Of course painting also paints the logo. They make silver sharpies, so after the paint dries you can touch the high points of the lettering and restore.
- My cabinet back and front were filthy. I disassembled both completely to get to plastic - no metal. Then down to the kitchen sink and Dawn dishwashing liquid. Good for dishes, good for getting oil off of sea birds, great for plastic radio cabinets. Just rinse and dry thoroughly. This shows the cabinet front before washing - and the faux speaker outline.

- The bezel for the volume control popped off my cabinet front. This was probably a good thing, because the silkscreen had deteriorated to the point it was unrecoverable. Because the aluminum piece was loose, I got rid of the silkscreen completely with acetone. Keep that acetone away from the radio cabinet! It will etch everything it touches! You can get acetone where they sell fingernail polish remover. Until the "sniffer" losers find out about it and they ban that, too!
A note about alcohol for cleaning - I don't recommend it. It attacks the silver paint they use on the cabinet front. It only takes a split second and the finish is ruined. I had no choice because somebody had tried to use axle grease to fix scratchy pots and sticky tuning. And I marred the silver finish. If you make a mistake, get some facial grease off your forehead and it will restore minor alchol cosmetic damage. But try to use Dawn wherever you can.
- Tape sometines takes a razor blade held at a very shallow angle. Since there was no silvered paint anywhere near, I was able to use alcohol to get rid of the residual adhesive.
Disassembly of the Cabinet Back
- The antenna terminal board is held by two screws. Remove them.
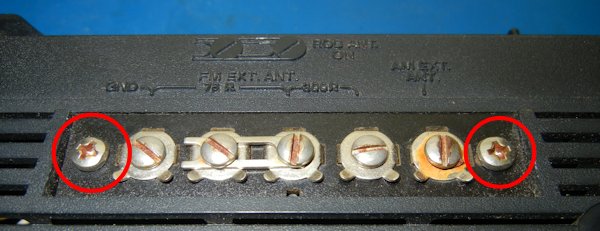
- The antenna terminal board can then be removed and set aside.
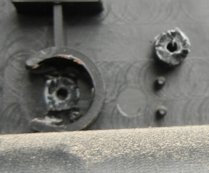
- Pry the battery terminals out of their slide positions. The spring clip is more challenging because the portion attached to the wire has to be bent, very slowly and carefully out of the way. Do not re-bend it.
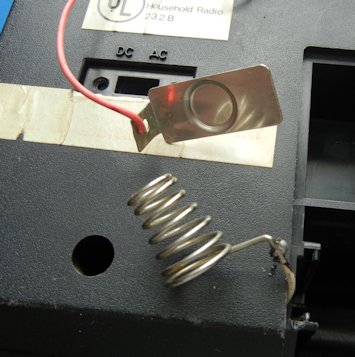
- I found the last battery terminal, the intermediate one between the two chains of batteries, to be very challenging to remove.

- To remove the transformer, unscrew two screws.
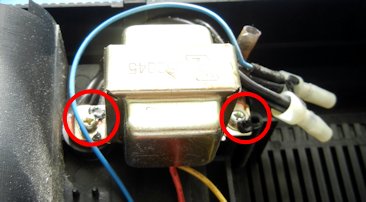
- One of the screws doubles as the line cord strain relief. The other has a tab to retain the power wires.

- I found mine had broken - I recommend E-6000 glue to fix it. 20 minutes later, it was strong enough to re-screw. Remember the fiber washer on the bottom of the transformer, it is an important safety component so the metal transformer tab doesn't cut into the power cord!
- The transformer and power cord cannot be completely removed from the cabinet back without removing the crimped wire nuts. You might be tempted to just cut them off, but closer examination shows a resistor on the end of the ground wire crimped in with the power wires.
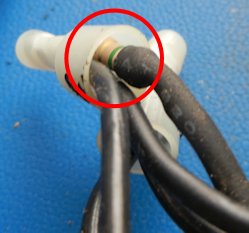
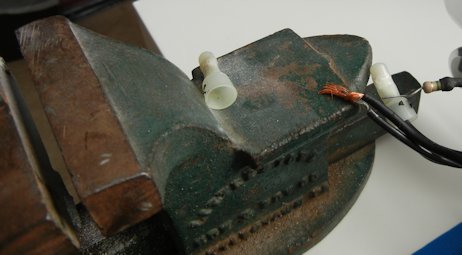
- I find that a good vise was enough to both un-crimp and re-crimp the wire nuts. You could also just use fresh wire nuts. But the ground resistor is an important safety component. Make sure it is secure!
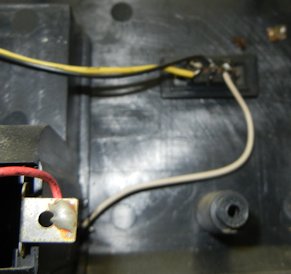
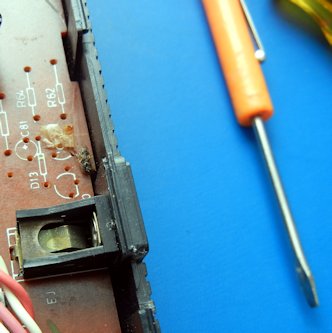
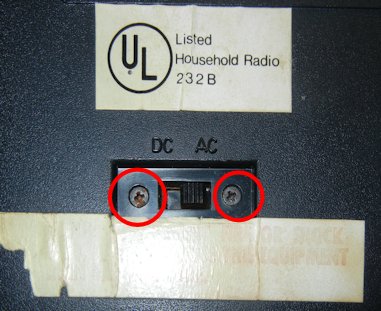
- If your radio has an AC/DC power switch, it can be removed from the back with two screws.
This completes disassembly of the radio.
