Radio Shack 2000629 Tech Page
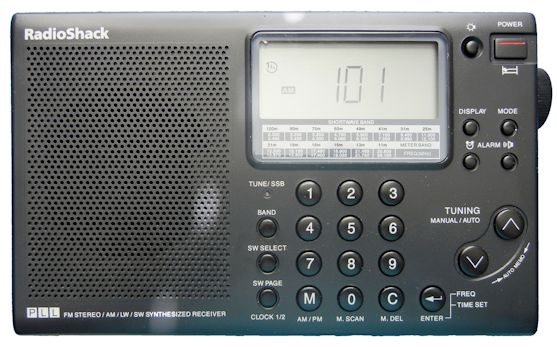
A multi-band LW, AM, SW, FM, FM Stereo radio for $31? Who could resist! Even if performance isn't very good, it is still a good casual radio. Plus, I could really use a SW radio that can tune the frequencies I use when I design downhole drilling tools - to quickly sniff out transmitter activation and relative signal strength. I placed my order, and waited for the radio to ship to a local store.
The radio out of the box is as advertised. There are a lot of options on the radio - which leads me to believe it was originally a much more expensive radio. It does appear to be a re-branded Sangean ATS-505. But after many years of analyzing Radio Shack products, I am well aware of Radio Shack cost reduction design. A quick web search on the ATS-505 reveals that the Radio Shack is 2000629 is almost identical in appearance except for being black instead of silver. The operating instructions of the ATS-505 alse describe identical functionality. So the chances are good that this is a re-branding and not a re-design. Until I can examine an ATS-505, that will be my theory.
AM performance was lackluster - distant stations come in about as well as on an average low cost radio. FM selectivity and sensitivity is not bad out of the box, a pretty decent portable FM. Shortwave and longwiave appear to work properly and have a good degree of sensitivity. As I am not a big shortwave fan, I am not really equipped to comment on relative SW performance. However, the digital tuning, inclusion of all SW bands - the ability to tune off of SW bands and have general coverage is nice. I was disappointed that I cannot tune between the longwave and AM bands to have continuous coverage from 153 kHz to 30 MHz.
Like my other radio pages, this is a work in progress. I will start with the procedure to safely get to the circuitry inside.


I recommend de-soldering the fragile speaker leads to avoid breaking them. The size of the speaker is a bit of a disappointment, but most people are probably buying this radio for shortwave, which seems to be mostly talk.
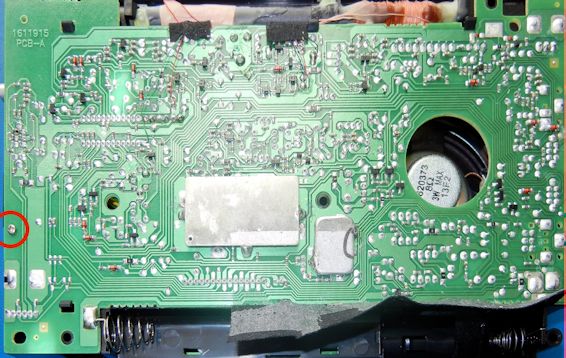
There is one screw on the left hand side of the board, and several clips holding the board to the plastic chassis. I did not remove the board from the plastic chassis, though, because access to the top side of the board would prove to be very good even with the chassis attached. When you look at this PC board, you see numerous SOT-23 resistors and small surface mount passives. It will not be easy for the average user to work on this radio!

Is it possible to upgrade this ferrite bar? It appears that the case is big enough for a 200 mm bar:
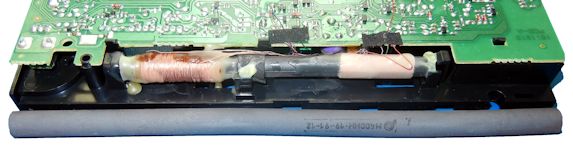
Unfotunately appearances are deceiving. There is a "clarify" pot that is partially in the way. Also, you cannot use the existing AM and LW coils. They will not fit the larger diameter ferrite bar shown here. I had the good luck of having an extra longwave coil, and several extra AM coils.


I dd some experimentation, but didn't actually change out the antenna. To do that, I would have had to re-wind both the AM and LW coils - something I didn't want to do. I did take some close-ups of the connections in case you want to do it:


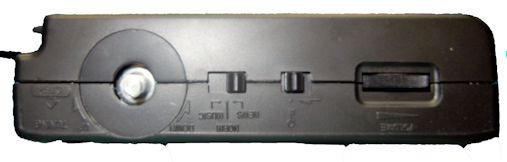
The display board is secured to the chassis by two screws and several clamps. But it is also secured on the side by a nut around the tuning pot and a clamp from a switch:


This also gives us our first view of the top side of the circuit board. As I said - the access to the top of the board is really good. So I didn't think it necessary to remove the board from the chassis.

This completely my initial foray into the interior of the radio. Once re-assembled, I was astonished to find that the FM performance was supercharged! First adjacent frequencies on non-HD stations are pretty much open unless you are on top of a local. There are some very weak translators over 25 miles from my house, they punch in with ease. They do not on any other portable I own. Very faint rim shot stations also punch through better than on any other portable. This has become an amazing FM DX portable - I am very impressed with it!